|
|
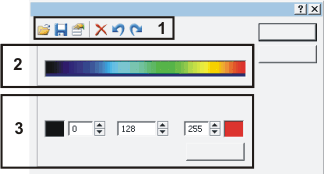
Use the Image > Pseudo Color... command, to change the active image's color table, or to define a new color table. You can use pseudo color tables to have gray-value images displayed in color. Then every intensity value in an image will be allotted a hue. Prerequisite: This command is only available when the active document is a gray-value image. Click on one of the areas in the dialog box shown schematically below, to jump to the corresponding help topic. (2) Displaying the current color table See also Changing the way an image is displayed (1) Toolbar in the dialog boxThe Pseudo Color dialog box has its own toolbar.
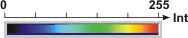
See also (2) Displaying the current color tableIn the dialog box, the current color table will be shown. In the illustration, for example, you can see the predefined color table Rainbow-BlackToRed.
The color table shows you in which color the image's individual intensity values will be displayed. On the left, the intensity value 0 (black) is shown, on the right, the intensity value 255 (white). (3) Editing a color tableIn the Edit Color Table group, you can assign colors to a range of intensity values. You define the intensity range via the Start and End fields. In the Start field, enter the first, and in the End field the last, value of the intensity range. Alternatively, you can define the start and end values for the intensity range directly in the displayed color table. To do this, keep the left mouse button pressed and drag the mouse over the intensity range you want. The values in the Start and End fields are updated correspondingly. To choose the colors, click on the color fields next to the Start and End fields. By doing this you will open the Colors dialog box. In it, select the color you want and confirm it with OK. The color you've chosen will then be shown in the Pseudo Color dialog box. Click the Apply button to apply the settings in the Edit Color Table group to the current color table.
To assign the intensity range one single color, select the same color in both color fields.
To assign the intensity range a color gradient, select a different color in each of the color fields. Enter in the middle field Divisions the number of colors that the color gradient is to contain. In this way you can display the intensity values of an image in e.g., only 10 colors. From the values, your software calculates the color gradient.
The illustration shows color tables in which a color gradient from yellow to green has been set. The tables differ in the value that has been entered in the Divisions field. The value used is specified on the right. 1950 27022013 |