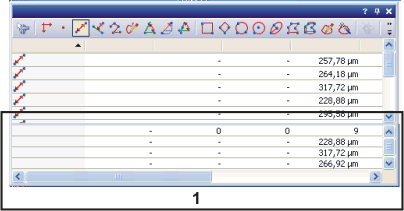
Your software offers a wide range of measurement functions. They enable you to quickly count objects, and measure distances and areas on an image.
The following step-by-step instructions present the measurement functions to you by way of several examples.
Measuring image objects interactively
Outputting various measurement parameters
See also
Measuring image objects interactively
Task
You want to measure the diameter of some cells.
To do this, load a suitable image, or acquire one.
Subsequently edit the measurement. Delete some of the measurements you've made. Enter the results in a MS-Excel sheet.
1.Use the View > Tool Windows > Measurement command to make the Measurement tool window appear.
2.You'll find the tool window at the lower edge of the user interface. It's possible that it might be covered by the Line Profile tool window. Click the Measurement tab at the bottom of the user interface to bring the tool window into the foreground.
Loading an image
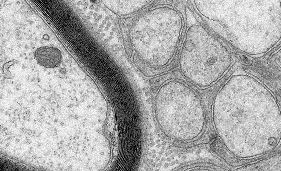
2.Acquire an image or load one.
•
Setting the labeling color
The measurement results will be written into the image according to the default settings, in red font color and without a background. Change the labeling settings.
3.Use the Tools > Options... command.
4.Click the Measurement > Measurement Display entry in the tree view.
5.Click in the Background Color field, and choose, e.g., the color Black.
6.Select the Text color > Fixed colors option and select a suitable color from the palette.
7.Close the dialog box with OK.
Measuring lengths
8.Click the Arbitrary Line  button, located on the toolbar at the top of the tool window.
9.Click with your left mouse button at the starting point and end point of the reference distance.
10.If you have measured a reference distance, you can immediately proceed with the next measurement.
11.Click the Arbitrary Line  button again to end the length measurement.
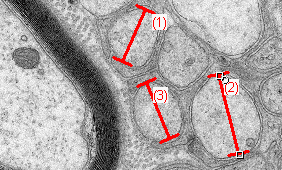
12.Take a look at the results in the tool window and in the image.
13.The illustration shows the image with three executed measurements. The measurement 2 has been selected.
Deleting measurements
13.Click one of the measurement results in the Measurement tool window.
14.The corresponding line will be selected in the image.
14.Press the [Del] key.
15.The measurement will be deleted both in the image and in the tool window.
16.When a measurement has been deleted, the image and the tool window contain one measurement less. The IDs of the remaining measurements won't be changed by the deletion of a measurement.

Note: When you've completed the measurements, you should switch off the measurement mode, since otherwise, you might inadvertently select your measurements and move them.
15.Check whether one of the buttons on the Measurement tool window's toolbar appears clicked. Release this button
Exporting results to MS-Excel
16.To do this, click the Export to Excel  button.
17.In the In/Output dialog box you set up the directory in which the data is to be saved, and enter the name of the MS-Excel sheet. Adopt the file type Excel-Sheet (*.xls).
18.Click the Save button to have the MS-Excel sheet with the measurement results saved.
Closing the image
19.Click the button with the cross [ x ] to the right of the image name in the document group.
20.You have changed the image because you've added interactive measurements. For this reason, you'll receive a query whether you wish to save the image or not.
20.Save the image in the TIF or VSI file format. The measurements will then also be saved in the image file. They can at any time, be edited deleted or augmented.
Outputting various measurement parameters
Task
You want to measure some cells.
Measure the cell as a circular surface. Have a variety of measurement parameters, such as the area, the perimeter and the diameter, output. Have the diameter shown in the image.
1.Acquire or load an image.
Measuring areas
2.In the Measurement tool window, click the 2 Point Circle  button.
3.Left click the center point of a cell that you want to measure.
4.Move your mouse, and in the process drag out the circle. Match the circular object as well as possible to the cell. Click the left mouse button.
5.Click the 2 Points Circle button again, and switch off the measurement mode.
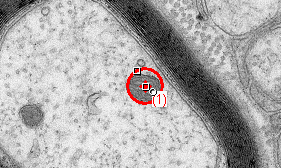
6.Take a look at the result in the Measurement tool window.
7.The illustration shows the image with a circle measured.
Viewing the list of measurement parameters
7.In the Measurement tool window, click the Select Measurements  button.
8.In the dialog box you'll see a list with all of the available measurement parameters. At the bottom of the dialog box you'll see a list of the measurement parameters that are currently calculated for all objects.
9.A detailed description of this dialog box can be found here.
Outputting additional measurement parameters
8.Go to the list of all of the available parameters, then click the Diameter measurement parameter.
9.On the right, an illustration shows you how the parameter is calculated.

You can see that there are different ways in which the diameter of a 2D object can be calculated.
9.Click the Mean entry in the list under the illustration, to select the Mean (Diameter) measurement parameter. When you do this, the mean value of all of the possible diameters is determined.
10.Click the Add 'Mean (Diameter)' button.
•This measurement parameter will be added to the list of measurement parameters to be calculated. All of these measurement parameters will be displayed in the tool window.
11.Close the dialog box with OK.
12.Take a look at the result for the circle's diameter in the Measurement tool window.
Outputting measurement parameters in the image
13.Open the Select Measurements dialog box.
14.At the bottom of the list of all of the calculated measurement parameters, click the Mean (Diameter) measurement parameter.
15.To the right of this list you'll see a button with a blue arrow  . Click this button to move the measurement parameter to the top of the list.
16.Close the dialog box with OK.
17.Take a look at the result for the circle's diameter in the image.
Measuring several images
Task
You want to measure cells on multiple images. To do so, acquire some images and measure them one after another. Have the results from all images displayed simultaneously. Take a look at the mean value for all of the measurements.
Loading images
1.Acquire or load some images.
Measuring cells
2.Activate the first image in the document group.
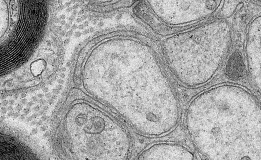
3.Click the Arbitrary Line button, located on the toolbar at the top of the Measurement tool window. Measure the diameter of several cells.
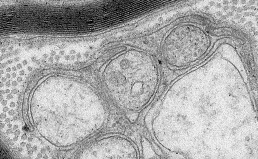
4.Activate the next image. Measure the diameter of several cells on this image, too.
5.Click the Arbitrary Line button again, and switch off the length measurement.
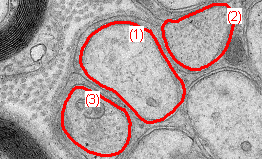
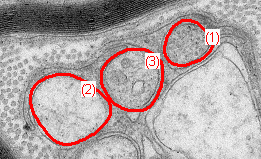
6.Cells have been measured on both images.
Displaying the measurement results of all of the images
6.In the Measurement tool window, click the Measurement Options  button.
7.In the tree view, select the Measurement > Results entry.
8.Clear the Show measurement objects > Only of the active image check box.
9.Close the dialog box with OK.
10.Now the results for both images will be shown simultaneously in the tool window.
11.Use the Document measurement parameter to display the name of the image with which the measurement results are associated in the results sheet. Now you can match the measurement results unambiguously to an image, even if all measurement results are displayed together in the tool window.
Viewing the statistical parameter
10.In the Measurement tool window, click the Measurement Options button.
11.In the tree view, select the Measurement > Results entry.
12.In the Statistic group, you'll find various statistical parameters.
12.Select the Mean check box.
13.Close the dialog box with OK.
14.Now, in the Measurement tool window under the measurement results, the chosen statistical parameter (1) will by shown. You can see there the mean value for all of the measured images.