In the Count and Measure tool window, you can find a toolbar with which you can deal with individual objects. You can select one or more objects, add new objects, or delete objects. As well as this, it's possible to manually or automatically separate objects that are joined together. Should you not be able to see the Edit Objects group in the Count and Measure tool window, click the small black arrow to make it visible.
Editing the objects
The buttons in the Edit Objects group aren't available until the image has been analyzed. Some of the editing functions make it necessary to first select the objects you want to work on.
Select one or more objects, that you want to edit, then click one of the buttons to select the editing method. The results will be immediately updated. If, for example, you have deleted or added objects, their total number will be correspondingly adjusted.
Note: When you have edited objects in an image, then analyze the image again, the changes you've made will be lost.
Separating objects automatically
See also
Carrying out an automatic image analysis
Tool Window - Count and Measure
 Selecting detected objects
1.Carry out an object analysis on the current image or load an image with an existing object analysis.
2.Click the Select Detected Objects button in the Count and Measure tool window to switch to the selection mode.
3.Now, as soon as you move the mouse onto the image, the shape of the mouse pointer will change. The shape of the mouse pointer is different depending on whether the mouse pointer is on an object or not.
3.Click on any object to select it.
4.The selected object will be displayed hatched, and can now be edited.
5.The corresponding row in the Object Measurement results view will be selected. Thus, selecting, is one more way in which you can examine measurement values of individual objects.
6.Alternatively, you can also use the Selection Tool  button, located on the Toolbox toolbar.
Selecting several objects
4.To select several objects simultaneously, in the selection mode, while keeping the [Ctrl] key depressed, click the objects you want to select, one after the other.
•Every object you click will be added to the selection.
•Alternatively, you can also keep the left mouse button depressed, and while doing so, drag out a frame. All of the objects that are fully, or only partly, within this frame, will be added to the selection.
Undoing the selection
5.To undo a selection, in the selection mode, while keeping the [Ctrl] key depressed, click the selected object again.
•The selection will be undone.
Selecting all of the objects
6.To select all of the objects simultaneously, use the keyboard shortcut [Ctrl + A], in the selection mode.
Selecting objects via the results sheet
You can also select objects using the results sheet in the Count and Measure Results tool window. This method can be useful if you only want to select objects with specific numerical values, for example.
1.In the Count and Measure Results tool window, click any row in the Object Measurement results sheet.
2.The row will be selected. The corresponding object in the image will also be selected, and will be displayed hatched. You can always recognize which object belongs to which measurement result.
3.You will then automatically switch into the selection mode.
2.You can here also select several rows simultaneously, or undo selections once more. To do this us the same keyboard shortcut that you use for the selection of objects in the image.
3.Then click the Select Detected Objects button, located in the Edit Objects group, again to leave the selection mode.
 Adding new objects
1.Carry out an object analysis on the current image or load an image with an existing object analysis.
2.To add new objects to an image, use the New Object button in the Count and Measure tool window. Click the arrow next to the New Object button.
•A context menu opens that offers you 2 tools for adding objects. You can add an object as a polygon or as a circle. It's also possible to use both tools on one image.
3.Click on a tool, e.g., the New Circle Object...  button, then move your mouse pointer onto the image.
•The shape of the mouse pointer on the image indicates the current mode.
4.While keeping your left mouse button depressed, drag out a circle on the image, that is to be added as a new object.
5.Confirm your selection with the right mouse button. Add, if necessary, further objects.
•The results shown in the Object Measurements table are updated and the object count is increased accordingly.
 Deleting objects
1.Carry out an object analysis on the current image or load an image with an existing object analysis.
2.Click the Select Detected Objects button in the Count and Measure tool window to switch to the selection mode.
3.Click on an object to select it. If you want, expand the selection and select more objects to be deleted.
4.Click the Delete Selected Objects button to delete the selected object.
5.All of the selected objects will be deleted from the image. The corresponding data in the Object Measurement sheet will be deleted.
5.You can also select objects using the results sheet in the Count and Measure Results tool window. Select one or more rows there. Then right click and select the Delete All Selected Objects command in the context menu.
 Separating objects manually
1.Carry out an object analysis on the current image or load an image with an existing object analysis.
2.Click the Manually Split Objects button, then move your mouse pointer onto the image.
3.The shape of the mouse pointer on the image indicates the current mode.
3.Next, while keeping your left mouse button depressed, drag a line through the object that you want to separate into two. Make sure, when you do this, that you drag the line over the object's outside edge, since otherwise it won't be separated. You can also separate several objects with a separation line.
4.Right click to confirm the separation line.
5.The object will then be divided up into two independent objects.
6.The classification is updated. As a consequence, some objects may now be assigned to other classes. The object count is increased, and a new line is added to the results sheet.
 Separating objects automatically
1.Carry out an object analysis on the current image or load an image with an existing object analysis.
2.Click the Select Detected Objects button in the Count and Measure tool window to switch to the selection mode.
2.Click one or more objects to select them.
3.Click the Auto Split Selected Objects button to have the touching objects automatically separated.
4.Objects that fulfill the morphological criteria for a separation, will be separated.
5.If a lot of objects are selected, the automatic object separation can take a long time. If this is the case, a progress bar is displayed in the status bar. You can abort the process at any time by clicking the Cancel button.
6.The results will be correspondingly updated.

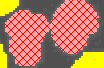

Left: A joined up object that is to be separated.
Middle: The joined up object has been selected.
Right: The joined up object has been separated, there are now two independent objects.
Note: The automatic separation of objects only functions in cases that are very clear-cut. For this reason, the recommendation; apply a morphological filter before the actual object analysis is performed, to generally improve the separation of objects. You can find more information on morphological filters here.
00503 19112014