You can retroactively change the properties for the magic wand for every single measurement. To do so, select the measurement object, and click your right mouse button, to open a context menu. Use the Magic Wand Properties... command, to open a dialog box in which you can change the settings.
Default settings for measurements with the magic wand
The settings in the Tools > Options > Measurement > Magic Wand dialog box are default settings for all measurements that you make with the Magic Wand measurement function. Changes made to these settings have an immediate effect on all of the measurements that follow.
Description of the function groups
See also
Measurement Object - Magic Wand
Tolerance
Use the Tolerance slide control, to increase or decrease the size of the 2D object that was found.
When you use the Magic Wand measurement function, select a typical color value in the object that you want to measure. Depending on which color space you use, your software will calculate a value for this object point, e.g., the intensity value. The value in the Tolerance field is added to, and subtracted from, the source point's intensity value. By doing this, it determines an intensity range. All of the neighboring pixels that lie within this intensity range belong to the 2D object.
The tolerance value is, as a rule, the same for similar objects, so that you only need to set the tolerance for an image once.
Setting the tolerance value in the image
When you define an object on an image with the magic wand, a small cross indicates the selected point in the object. Simultaneously, a small square will also be displayed in the image. The distance between the square and the cross is a measure for the size of the tolerance value.
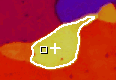
You can alter the tolerance directly on the image with your mouse. To do so, select the measurement object, then, while keeping your left mouse button depressed, move the small square. The further the small square is from the cross, the greater is the tolerance value. In the image window, you can observe what effect the changed settings have on the image.
Smoothness
You can have the image smoothened before you use the magic wand. When you do this, image defects are suppressed and the object becomes, e.g., rounder in shape. The Rank filter is used as a smoothing filter. Using it filters out noise and individual bright or dark pixels (shot noise). In the Smoothness field, enter the size of the pixel neighborhood used by the Rank filter. When the value 0 is used, the smoothing filter is switched off. The larger the value, the greater is the effect of the smoothing.
Color space
The four buttons are options with which you can specify the color space within which you define the tolerance. These buttons are only relevant for 24-bit true-color images. The RGB color space is preset for true-color images. With binary, 8-bit gray value, 16-bit gray value and 8-bit pseudo color, images, the tolerance value determines, in all cases, the gray threshold value.
RGB
In the RGB color space, the tolerance value is always added to or subtracted from the R, G, and B value of the source point. Using the RGB color space makes sense, when you have to detect one or more hues with very little difference in saturation. This is because in the RGB color space, other colors are detected before all of a color's saturation steps have been exhausted.
HSV
In the HSV color space, the tolerance value is always added to or subtracted from the H, S, and I value of the source point. Using the HSV color space makes sense, when a complete hue is to be detected, in all saturation steps except black, white and gray.
Color
In the "Color" color space, within the HSV model, the tolerance value is always added to or subtracted from the source point's color value. Using the "Color", color space makes sense, when a complete hue is to be detected in all of its saturation steps. Even very low saturations of a color are detected.
In the color circle, the saturation increases from the middle to the outer regions. The intensity is the same for all pixels. The color values run around a circle from H=0 (red) to H=360. The color circle shows the differences when different color spaces are used.
Intensity
In the "Intensity" color space, within the HSV model, the tolerance value is added to, or subtracted from the source point's intensity value. Use this color space when the image is indeed, a true-color image, but contains very little color information.
4410 14112011