Use the Define Macro Batch dialog box to define a batch process for a macro. In the second step, you specify whether, and where, the batch process's resulting images are to be saved.
Description of dialog box
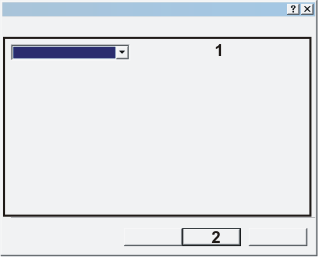
(1) Defining the destination
Depending on the destination you selected, the appearance of the dialog box will change. You can save the resulting images of a batch process to a directory on a data storage medium. Or you do not save the resulting images at all.
(2) Checking the definition of the batch process
See also
Define Macro Batch - Summary (Step 3)
(1) Defining the destination - File system
Select the File System entry in the Destination list if you want to save the resulting images on a data storage medium when the batch process has been completed.
Setting the storage location
The directory that is currently being used as a storage location for the resulting images is shown at the bottom of the dialog box, under the Preview entry.
Click the Browse... button to choose another directory.
If you selected image files as input that have been saved in the file system, you can save the processed images in the same directory as the source images. In this case, change the file name in order to be able to distinguish the processed images from the source images. Alternatively, you can overwrite the source images.
Setting the file name
Click the Naming... button to specify the file name for the resulting images.
The current image name is made up of the text and the placeholders which are listed in the Selection column. Use, for example, the <Name> and <Date> placeholders to set different names for the source images and the resulting images.
Setting the image file format
Select the file format you want for the resulting images, in the Image file extension list. There are numerous established image file formats available.
For the image file formats TIF, VSI, and JPEG, there are also additional settings that should be taken into account when you export images. Click the Options... button if you want to see these settings or change them.
Note: Images can contain a lot of additional information. This includes e.g., image calibration, measurement results, or drawing objects. Most of this data will only be saved along with your image when you use the TIF or VSI file format. If you use any other file format, the data will be irrevocably lost when you save the image.
Overwriting existing resulting images
Select the Overwrite check box to allow the overwriting of resulting images in the selected storage location. When you carry out a batch process several times one after the other with the same settings, in this case, the old resulting images will automatically be overwritten with the new ones.
The source images are only overwritten if you exclusively used the <Name> placeholder as file name for the resulting images of the batch process.
Clear the Overwrite check box to specify that under no circumstances are existing files to be overwritten.
Closing the resulting images in the software
To make it possible for the macro to be used, the source images will be automatically loaded into your software and processed there. Decide whether or not the images are to remain loaded in your software.
Select the Close after save check box to have the images closed in your software. You can at any time view individual images or all of the images in your software, after the batch process operation has been carried out, by loading the image file from the specified storage location into your software.
Clear the check box. Then all of the resulting images remain open in your software, where you can then view them, when the batch process operation has been completed. When you process numerous large images, it can put a strain on your system's memory.
Checking the settings in the preview
You can check some of the settings you selected under the Preview entry. The storage location, the selected file name and the file name extension are shown.
(1) Defining the destination - No Save
Select the No Save entry in the Destination list, if you don't want to save the resulting images when the batch process has been completed.
Select the Close check box to close the images in your software when the batch process operation has been carried out. You will then not be able to view the individual results.
Clear the check box. Then all of the resulting images remain open in your software, where you can view them, when the batch process operation has been completed, and, if necessary, also save them.
(2) Checking the definition of the batch process
Click the Next > button to check the settings specified for the macro batch process.
A description of this dialog box can be found here.
00411 13042013